Supplies used:
Enchanted Love, Enchanted Stripe, Enchanted Whispers Patterned Papers
Coordinating Double Dot in Blush and Passion Fruit
Enchanted 12x12 Chipboard
Enchanted Noteworthy
Enchanted Jewels
Enchanted Brads
Enchanted Combo Sticker
Smoochable Clear Stamps
Smoochable Trinkets
Crazy Love Pink Rose wraps
Tin Foil
White Acrylic paint
White Cardstock
Edge Punches
Black Ink Pad
Butterflies of choice
Cut a piece of Coordinating Double Dot in Passion Fruit to 11 1/4 x 11 1/4 and distress the edges and then stitch to the Enchanted Whispers paper.
Cut the glittered circle design from the Enchanted love paper (this is much easier than it looks!) and adhere to the Passion Fruit paper.
Cut a piece of paper from the Enchanted Stripe paper +- 6 1/2 inches wide, I used the centre piece on either side of the swirls. Cut 2 pink and 2 white strips using edge punches of your choice, (I used Martha Stewart Doily Lace and EKSuccess Scroll & Dots and Double Embossed Dotted Lace) and adhere to the striped paper like this.
Then stick across the centre of your page.
Now we are going to make a heart with some aluminium foil. Cut two strips of foil approximately 3 inches wide from a long roll of foil and start carefully scrunching to aproximately an inch wide.
Form into a large heart shape (about 9 1/2 inches tall) and join at the top and bottom of the heart. It looks a bit strange at this point but I promise it does look better once you are done!
Then use some white acrylic paint to paint all around the heart, this should cover most of the surface with only small bits of silver showing through everywhere.
Matt your photo (I used a 7x5 inch photo that was slightly cut down) onto white cardstock and then onto a piece of distressed Passion Fruit cardstock and stick to your background page once you have positioned it where you want it. Stick your heart down over your photo and then use two of the corners from the Enchanted Chipboard on the top corners of your photo.
Now you can make some flowers using the cute Smoochable stamps! I just stamped a whole lot of hearts onto some Passion Fruit and Blush Double Dot using all four of the smaller hearts in the set and then cut them out.
Cut or punch out a circle for a base to stick your hearts to. Then stick 3 of the largest hearts as pictured below onto your circle. Then take another 3 of the largest hearts (I used the other colour to the first 3 hearts) and curl the top edges in.
Bend up in the middle of the heart and use a foam dot to keep that dimension before sticking to your circle in between the first 3 hearts.
Continue layering hearts 3 at a time in alternating colours until you have as many layers as you want, (I did 3 and 4 layers for my 3 flowers) and then add a brad or jewel of your choice to your centre.

For my title I used the love word from the Enchanted 12x12 chipboard but replaced the O with the pink gem trinket from the Smoochable Trinkets after painting it with white paint to match my layout. I also used a wooden word that I painted white then added a layer of crackle paint (you can also use PVA glue for the same effect) and then a layer of pink paint and roughed up the edges a bit with a nail file.
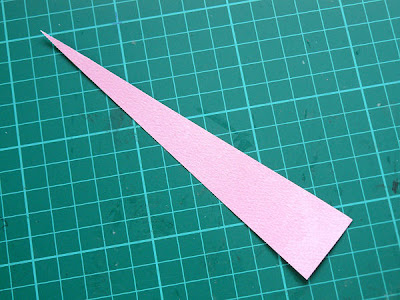
I have used a large butterfly on my layout and made the body for it by rolling a triangular piece of cardstock about 6 inches long.
Starting at the wide edge roll the cardstock tightly, I use my paper piercer to start it off and then stick the end down.
For my flower on the top right of the layout I have used a short length of netting from the crazy love wraps, doubled up and then tied. On top of that I stuck a shaped sticker from the Enchanted 12x12 combo stickers and then my flower.
Once you have finished making all the little bits for your layout you can then stick them to your page. I used a beautiful journaling box from the Enchanted Noteworthy as a base for my title and then stuck my title down on top using foam dots. Add finishing touches like chipboard swirls, butterflies and bling and then you are done!
I hope you have enjoyed todays tutorial!
Carin xx


Love this Carin! Loads of great tips and I love how you created the frame and the flowers!!!
ReplyDeleteBeautiful LO! Love all the layers and texture!
ReplyDeleteThis is amazing! I have never thought of using aluminum foil before. Thanks for the tutorial!
ReplyDeleteLove how you did the heart!
ReplyDeleteWhat a lovely LO - TFS all the tips and ideas.
ReplyDeleteToni xx
great use of materials!
ReplyDeleteSo so beautiful Carin - love all the elements in this.
ReplyDeleteKaren x
Wonderful layout, the flowers are stunning.
ReplyDeleteI would love to try the heart technique. How did you get the aluminum to stick to the paper?
ReplyDeleteWow!!! Just amazing! Thanks for all the details! Love the flowers!
ReplyDeleteThis is AMAZING Carin! You totally inspire me! I loveeeeeeeeeee how you put this together and loveeeeeeeeee the big heart! :):):):):):):):):):):)
ReplyDeleteVery pretty. Thanks for all the instructions and inspiration.
ReplyDeleteWoooow!!! It is amazing!!! Thank you so much for your wonderful tutorial!!! I would like to try it too!
ReplyDeleteThanks everyone :) Kathy to stick the heart down I used Glossy Accents and then added a bit of weight for a few minutes afterwards but double sided tape seems to work on the foil too as that is how I stuck the ends together :)
ReplyDeleteTFS!!!! Wonderful tips!!!!Great LO!!!
ReplyDeleteFab tutorial...lots of very clever ideas! Your layout is gorgeous.
ReplyDelete